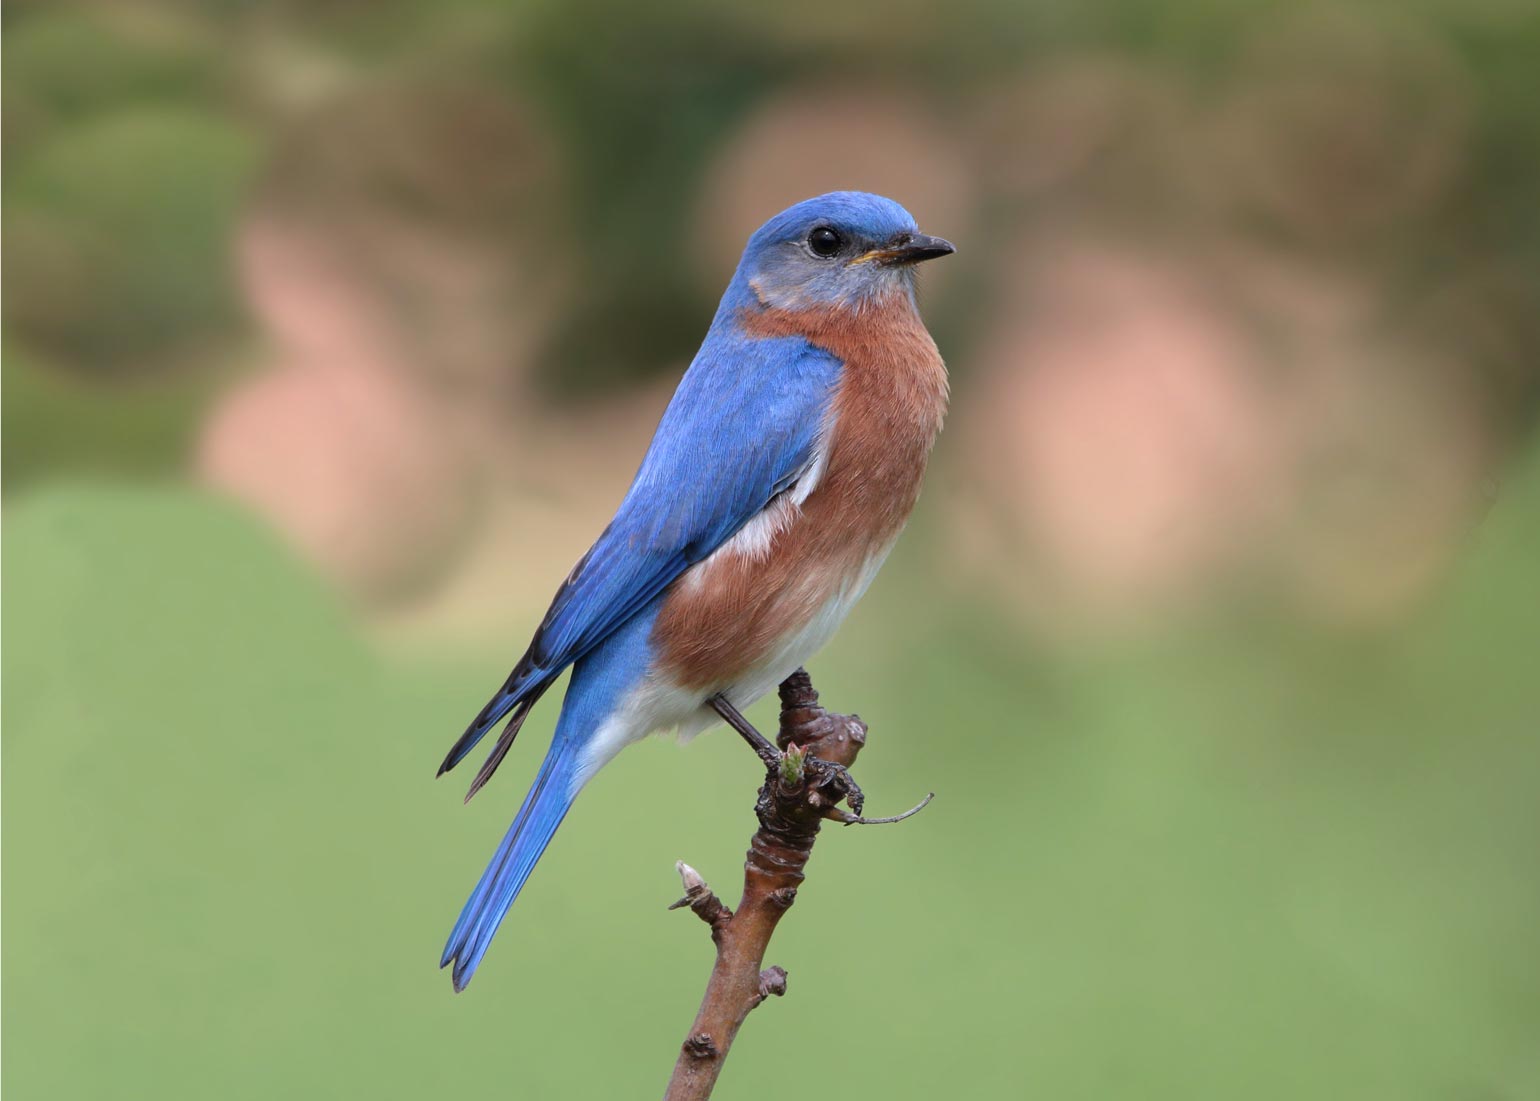
According to the Bermuda Audubon Society, the Eastern Bluebird is a native species of Bermuda. The island has the distinction of being the only location outside North America where the species breeds. While there was a time when you could sight a flock of fifty flying overhead, today the sighting of a single bird or a pair is a thrill.
The continual loss of critical habitat for sweet, beautiful bluebirds has placed them in peril. Fortunately, this is one environmental snafu man has contributed to that man can actually make right.
How, you might ask? By installing and maintaining bluebird nesting boxes across the island. If you have green space surrounding your home, office, club or school, please consider installing a box or perhaps even a Bluebird Trail.
Now is the time.
INSTALLING YOUR OWN BLUEBIRD BOX
Bluebird boxes should be in place no later than mid-March when bluebirds are looking for nesting sites. Ready made Boxes can be purchased through Bermuda Audubon and at Aberfeldy Nurseries.
If you’re the handy sort, you can also build your own with all materials readily available at local hardware stores.
Interested in building your own Bluebird Box?Find our "How to" Guide at the end of the article. |
MOUNTING & MONITORING YOUR BLUEBIRD BOX
Once you have your Bluebird boxes ready to go, follow the instructions for thow to best mount and monitor the box which can be found in “Making a Bluebird Box” pdf available on the Bermuda Audubon website.
In addition to Bermuda Audubon, information and advice is also available through the Bermuda Bluebird Society. They can help you put up a pole and install your box for a small fee and also assist with bluebird emergencies.
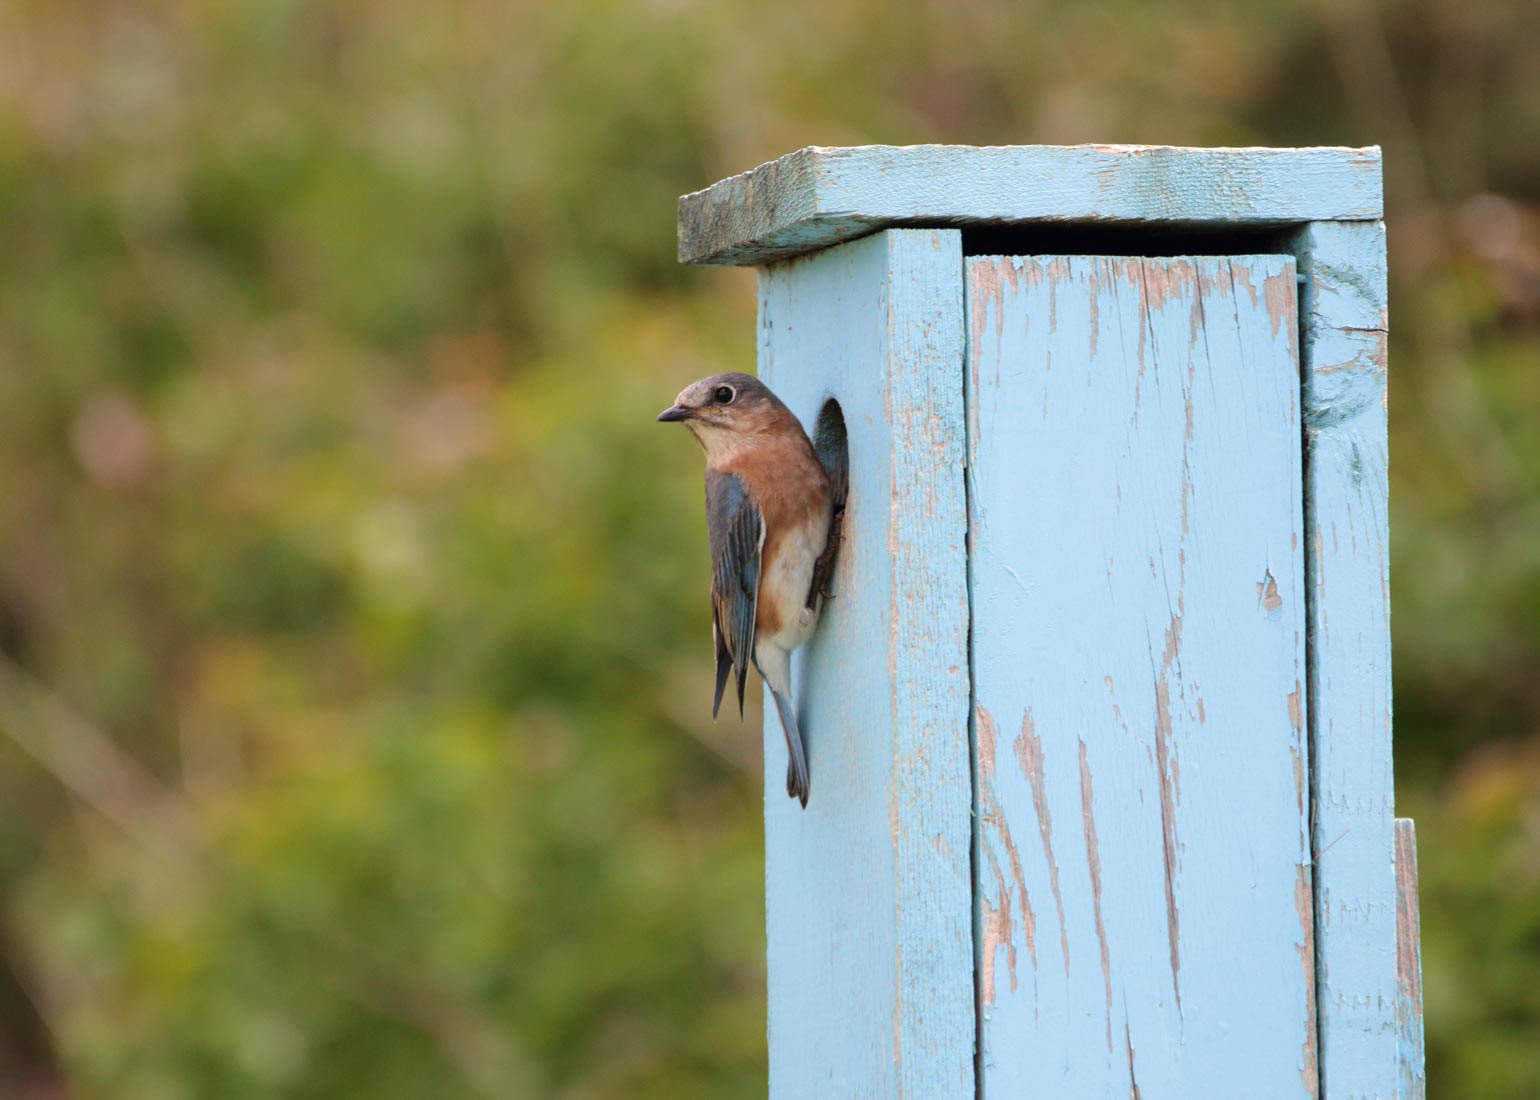
Once your box is up, maintenance is critical. Sparrows and starlings are major nest competitors evicting bluebirds from their nest sites, often killing chicks and adults in the process. So you should check your box frequently. This is easy to do as bluebird boxes are designed for easy access – typically just a case of removing a partially inserted nail that releases a side panel. Once the box is open, here’s what to look for:
- Bluebird nests are cup-shaped, tidy and typically made of woven grass or casuarina needles.
- A sparrow’s nest on the other hand is untidy and often strewn with trash.
- If you find an intruder in your box or the signs of one, shoo them away and remove their nests immediately.
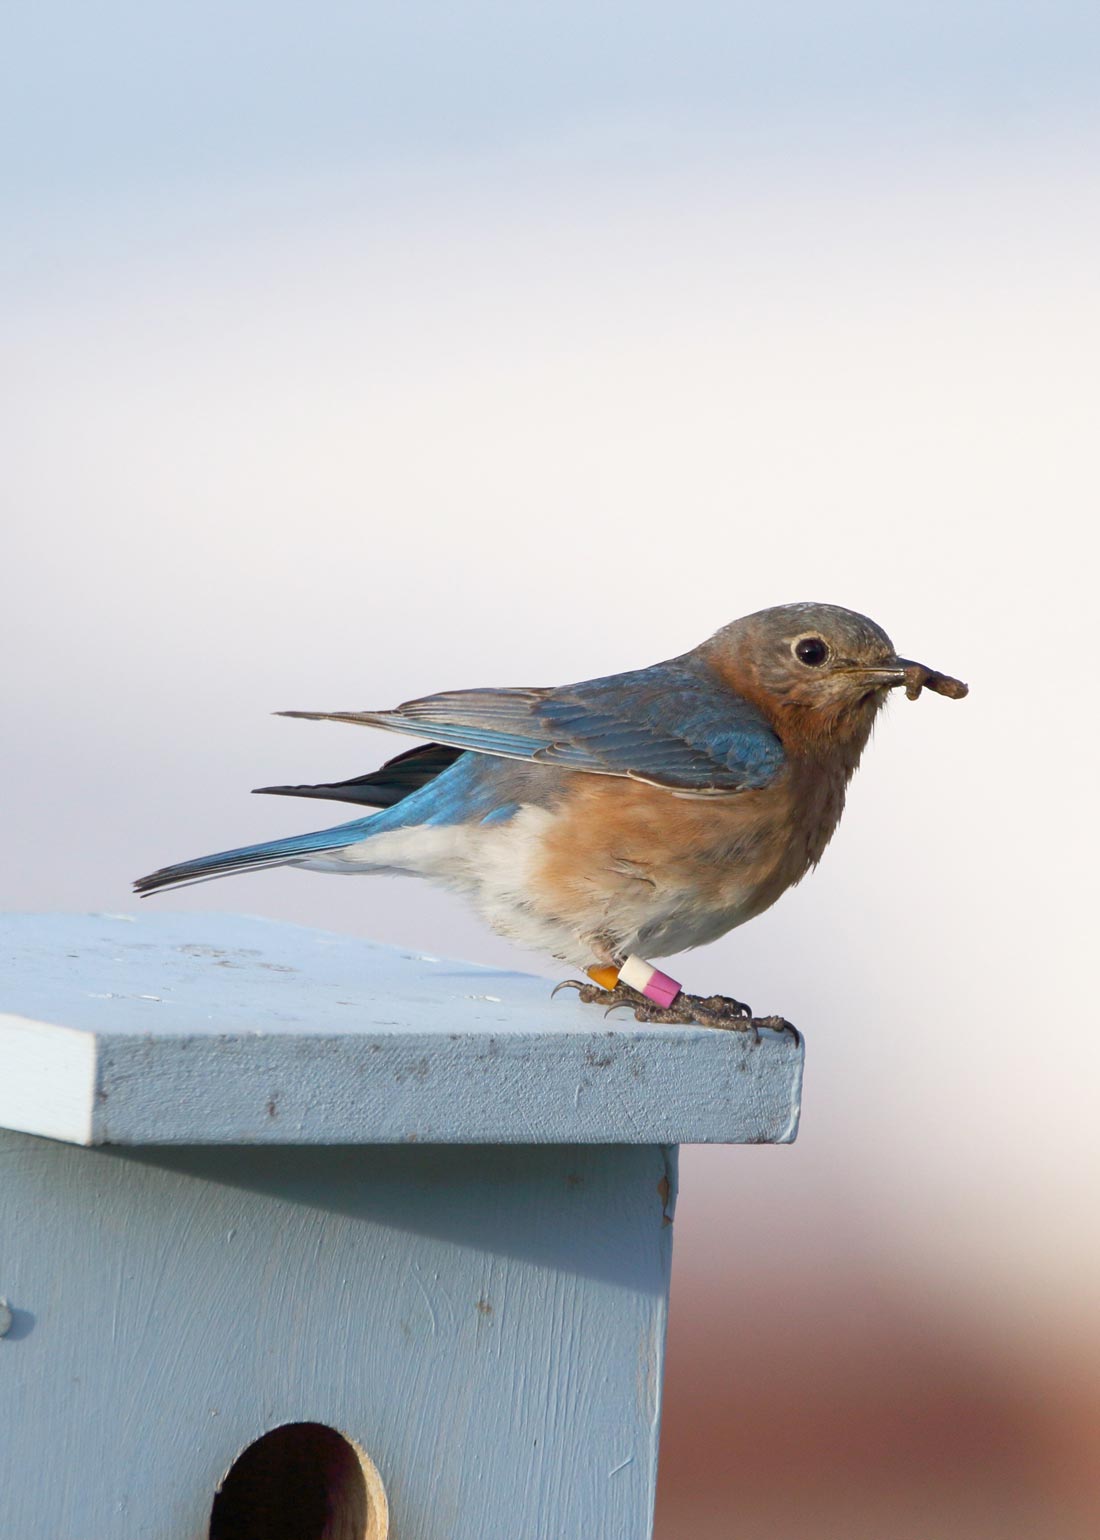
This writer recently had first-hand experience with the importance of checking the boxes. For the past two months, we have had a pair of bluebirds visiting our garden on a regular basis – mostly hunting but occasionally sticking their heads in the nesting box we installed to attract them. To my dismay, I’d also seen sparrows and starlings checking out the box and actually going in (the nerve) so I decided to peek inside. Approaching the box I could hear a commotion coming from within. When I opened the box a starling was sitting on a very untidy, half-built nest. She flew out and I then saw a downy, lifeless body shoved to one side. My heart sank. It turned out to be an adult sparrow – newly dead. It had received several blows to the shoulder and head area.
The Bluebird’s survival in Bermuda is now totally dependent on man
I buried the hapless homemaker in the garden and have vowed to check the box every day for the next few months. It’s become a bit of an obsession. I enjoy prime viewing from my kitchen window and am taking my role as guardian quite seriously. Time will tell if my constant shooing of intruders results in a bluebird family residing in our garden. This morning my little blue pair are back and giving their potential home a thorough inspection. All fingers are crossed. While the success of this pair in this garden is not a certainty, the odds of survival for Bermuda’s bluebird population increases with each box that is installed and maintained.
Once your box is in place, you can register it on Nestwatch - a citizen science programme run by the Cornell Lab of Ornithology. You sign up, register your box and enter your monitoring information such as when the eggs appear, how many eggs, when they hatch, etc. Bermuda Audubon is able to access that data which helps them understand the status of bluebirds on island.
Please consider joining this critical conservation effort and set up a box soon.
BUILD YOUR OWN BLUEBIRD BOX
Interested in building your own bluebird box? Follow our "How To" guide below for a great activity you can do with the whole family.
First thing to do would be to download and print the “Making a Bluebird Box” (pdf) from Bermuda Audubon, this has all the diagrams you will need to follow for their recommended Box design. Next you'll need to gather your materials and tools, local hardware stores can help you with everything you need to get the job done.
MATERIALS:
(Makes 3 Boxes)
- 1x - 1” x 12” x 8’ standard board (Solid, untreated wood is an ideal material, although exterior grade plywood can be used.)
- 1x - 1” x 1” x 36” standard board
- 6x - ¼” x 2” carriage bolts and nuts
- 60x - 1¾” galvanized smooth shank nails
- 3x - 2“ x 7’ galvanised pipe (plastic pipe may be used but should be filled with concrete to make stiffer)
- Vaseline or heavy grease
TOOLS:
- Hammer
- Drill
- Circular saw (recommended for straight cuts - but other saws can be used to suit your skill level)
- ruler
- 1½” Hole Saw drill bit
- ¼” drill bit
PREPARATION:
- Using a solid, stable surface, cut your 1”x12”x8’ board into 3 - 32” lengths. Then cut your 1”x1”x36” board into 3 - 12” lengths for the Back Extensions.
- Use the cutting diagram included in the “Making a Bluebird Box” pdf and a ruler to pencil in your cuts for each 32” board and label the panels. *Remember - “Measure twice, cut once”.
- Roof - 7” x 6”
- Front - 12” x 6”
- Back - 12” x 6”
- Bottom - 4.5” x 4”
- Side - 11.5” x 4”
- Side - 11.5” x 4”
- Take your “Front” panels and drill a 1½” diameter hole 2” from the top and horizontally centred. The entrance hole must be 1½” in diameter to allow Bluebirds to enter but to exclude the larger Starlings. Cut crisscross scratches on the inside of the front panel with a chisel or something with a hard edge. These will allow young birds to climb to the entrance hole and emerge.
- Take your “Bottom” panels and cut 3/4", at a 45 angle, off each corner and drill 9 - ¼” holes (in a 3x3 pattern) for drainage holes.
- Take your “Back” panels and pencil in a straight vertical line in the centre of the panel from the top to the bottom and drill 2 - ¼” holes along the centre line to attach the back extensions.
- Hole 1 - 2” from bottom
- Hole 2 - 4” from bottom
- Take your “Back Extensions” and pencil in a straight vertical line in the centre of the panel from the top to the bottom and drill 2 - ¼” holes along the centre line to attach the back extensions. Make sure these 2 holes line up with the 2 holes in step 5.
- Hole 1 - 2” from top
- Hole 2 - 4” from top
- You are now ready to assemble your Bluebird Box.
ASSEMBLY:
- Choose one side of the box (left or right) which you would prefer to be hinged so that it can be opened to check on the birds - This will be “Side B”.
- Attach your “Back”, “Side A”, “Bottom” and “Front” panels with nails spaced every 2” or so - following the diagram in the “Making a Bluebird Box” pdf. Make sure to have “Side A” sit flush with the bottom of the “Front” and “Back” panels to allow for a ½” ventilation opening at the top.
- Attach the “Side B” panel with 2 hinging nails to the “Back” and “Front” panel. Make Sure to leave the same ½” ventilation hole at the top as you do on “Side B”. The hinging nails must line up for the door to open smoothly. A door catch can be made by hammering a nail into the box edge and bending it over the edge of the door. It can then be swivelled up to open the door.
- Attach your “Roof” panel to the “Front” and “Back” panel with nails spaced every 2” or so. Make sure to have the panel flash with the “Back” so that there is an overhang over the “Front”.
- Attach the “Back Extension” by inserting the 2 carriage bolts through the holes in the “Back” panel from the inside, through the holes in the “Back Extension” and then tightening nuts onto the ends.
- Finishing Tips - Do not put a perch on the front of the box. Bluebirds do not need this to enter and it allows predator birds to perch and stick their heads in the box to kill adults or chicks inside. Boxes can be painted and decorated on the outside with any light colour of lead-free paint. Avoid dark colours, especially on the roof, as it will make the box too hot.